VOIP Home Phone
September 13, 2022 - Reading time: 6 minutes
Who still has a Landline anyways?
Well my parents insist on still having a home phone so that they don't have to worry about changing all their decades worth of contact info, as well overseas family that do call occasionally. I mean it would be such PITA to change; doctor's office, dentist, and work, etc.
One of the main reasons is the cost associated. Our current ISP Shaw Cable, over the years have increased the basic home phone package to something ridiculous of like $40/month for nationwide. We hardly do outgoing calls and receive robocalls or scam calls out of nowhere middle of the night.
Callcentric VOIP free testing
I wanted to see if VOIP was even going to be the same voice quality as what Shaw provided. I mean it should be the same as the technology is essentially the same, ATA connected to cable coax upstream.
It actually sounded the same if not slightly clearer. I used Callcentric with two throwaway accounts. Callcentric allows for free calls between other Callcentric subscribers. Using the area code 777 (If I remember correctly). Tried it out with the free Zoiper SIP Phone between 2 computers.
Phone ATA Scouting
I wanted to use standard home phones instead of buying expensive VOIP/SIP compatible phones. Mainly because my parents didn't want to change something that was working perfectly fine.
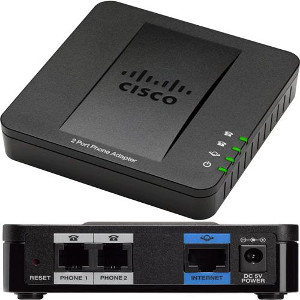
Many sources said to use a Obihai ATA with Google voice. I mean it would be great to use if wasn't restricted to US addresses and area codes. I stumbled upon a Cisco SPA112. Commonly used for small businesses. Perfect and a bit overkill for home use.
I made a network drop in the living room near the phone base for this reason. But then I later realized only that phone would be connected.
A later post I will discuss reinstalling the ATA where the old Shaw ATA would be in the garage so that all phone jacks in the house were usable.
Porting our Number to VOIP.MS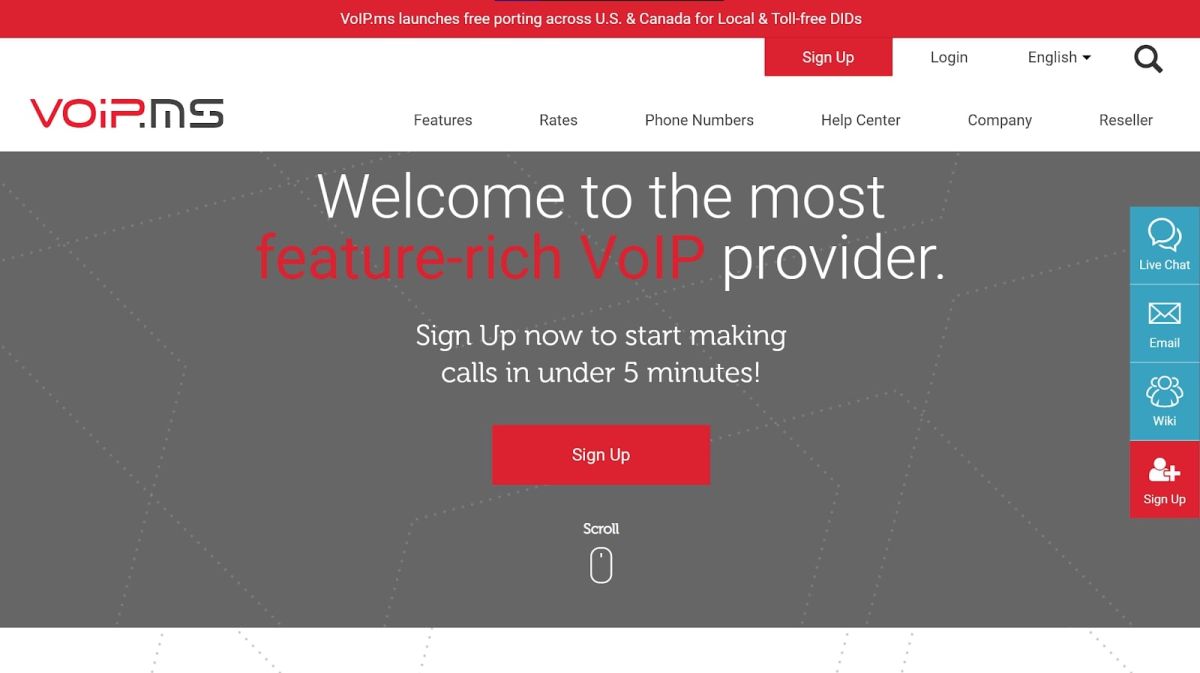
After some research on which VOIP provider to choose for home use, I decided to go with VOIP.MS. Seems like most people are happy with the cheap basic service. Before porting I chatted with our ISP just to know if there was any complications or fees from porting out. Years ago there was such fee, but I'm not sure if this is still happening after the whole CRTC amendments that telcos had to follow in the recent years. Luckily enough Shaw didn't care.
VOIP.MS only required a most recent bill from the service we are porting from and as well as the account number. Just like any standard porting procedure.
Inbound Call Filter, FreePBX to the Rescue
The Cisco ATA can register to a trunk directly from the unit without having a PBX but then most features would be limited; this included call filtering and custom IVRs.
FreePBX was daunting at first. Had to use a bunch of Youtube tutorials. I really liked what CrossTalk Solutions had for their setup series. Setting up the basic security and responsive firewall, because I wanted to be able to use the home phone while travelling in the future. So the FreePBX would be facing the internet.
Create an extension that only the ATA will use, and have it locked down on where it can be connected from and where the calls can be placed and destined to. I don't want some script kiddie from the internet getting access to the ATA (so a remote IP) and start making calls to somewhere. (Probably just drain my VOIP account balance).
The custom IVR call flow was really a gate keeper of blocking simple robodialers that aren't sophisticated enough to determine option inputs. 95% of all calls are "blocked"; the extension doesn't ring the phone but all calls are answered by the IVR.
What About Voicemail?
Well there is a few ways you can go about this.
- One is having the voicemail be initiated by VOIP.MS trunk side and kept recorded. (which has a cost associated for recording and retrieval from what I can tell)
- Letting FreePBX handle the voicemail.
- Letting the home phone answering machine attached to the ATA handle it.
I went with the last option as I didn't want to fuss around with FreePBX saving my voicemails and retrieving it with extension codes. When I literally have the answering machine in front of me. It took some tweaking on Extension for timeout timing to allow the call to continue when left unanswered by the home phone but enough time to kick in the voicemail stage.
So What are Your Costs Now?
Well its was roughly $80 for the ATA, $30 ish dollars for running the network drop supplies and $4.95 USD for porting the number, and a $1.50 USD for keeping the DID number and $0.85 USD for e911 service.
Per month at minimum its $1.50 + $0.85 USD with no calls being answered or made. On average it costs me roughly a $1 as we hardly make calls and only receive very short robocalls. My "plan" is pay-per-use and they do have a monthly fee per DID of ~$4.25 USD for incoming calls. And their outgoing calls are all pay-per-minute.
So by the third month of using this service I would've broke even on costs.
So after this whole experience I really recommend this approach as a solution for cutting the cord for home phone but still wanting a home phone.
Homelab: Build Log
June 4, 2021 - Reading time: 4 minutes
Location
The deciding factors when I chose the location were mainly where my runs will be made between finished walls and the multiple floors. At the time I wasn't really familiar with drywall repair nor wanting to patch up finished walls, and I worried about Asbestos being present due to the age of the house. So I settled on doing all my runs through the exterior walls with outdoor rated cabling and lots of caulking for minimal disturbance. All the runs come to a central location in the basement living room closet. See the following image of the runs coming together from the outside.
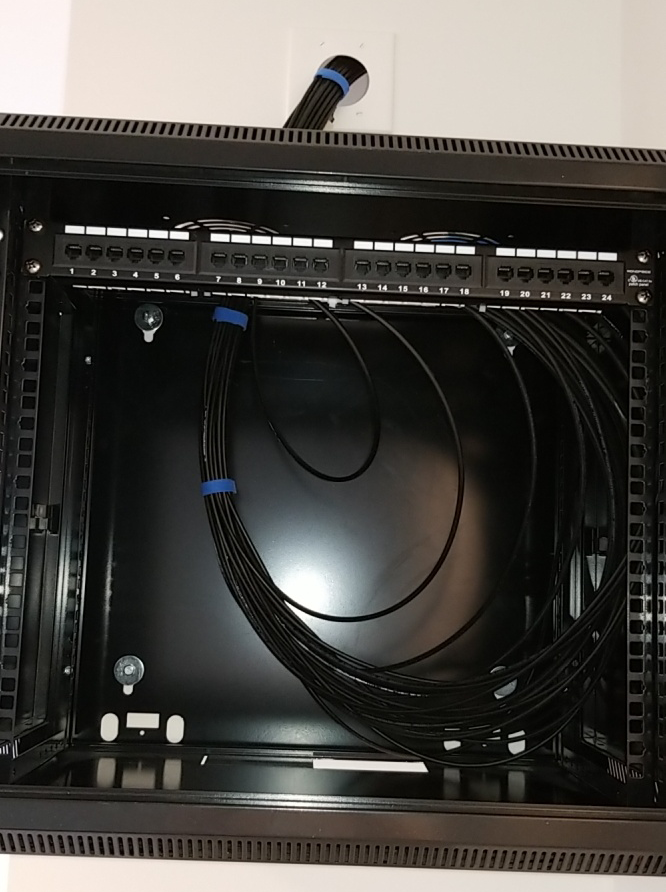
Patch Panel
About 20 or so runs were completed and terminated to a 1U patch panel. One run was mistakenly ended shorter than needed (ran out of cable) and had to do a coupling to extend a few more feet. I did not consider at the time for the difference in length from the first block to the last as it would made the first few runs 1-2 feet longer. I did try to put in a service loop that is hidden in the back as well. You can see what I mean in the following image.
More Hardware
I did some research where the PDU should be placed in the rack. I ended up placing it at the very bottom which allowed some space for extra power cables to be tucked away from sight. My strategy is to have power bundled and running from left, data on right. I also needed some sort of shelving so I use the PDU itself for non-rack-able items. PoE switch above the PDU needed some support as it wasn't a full width unit.
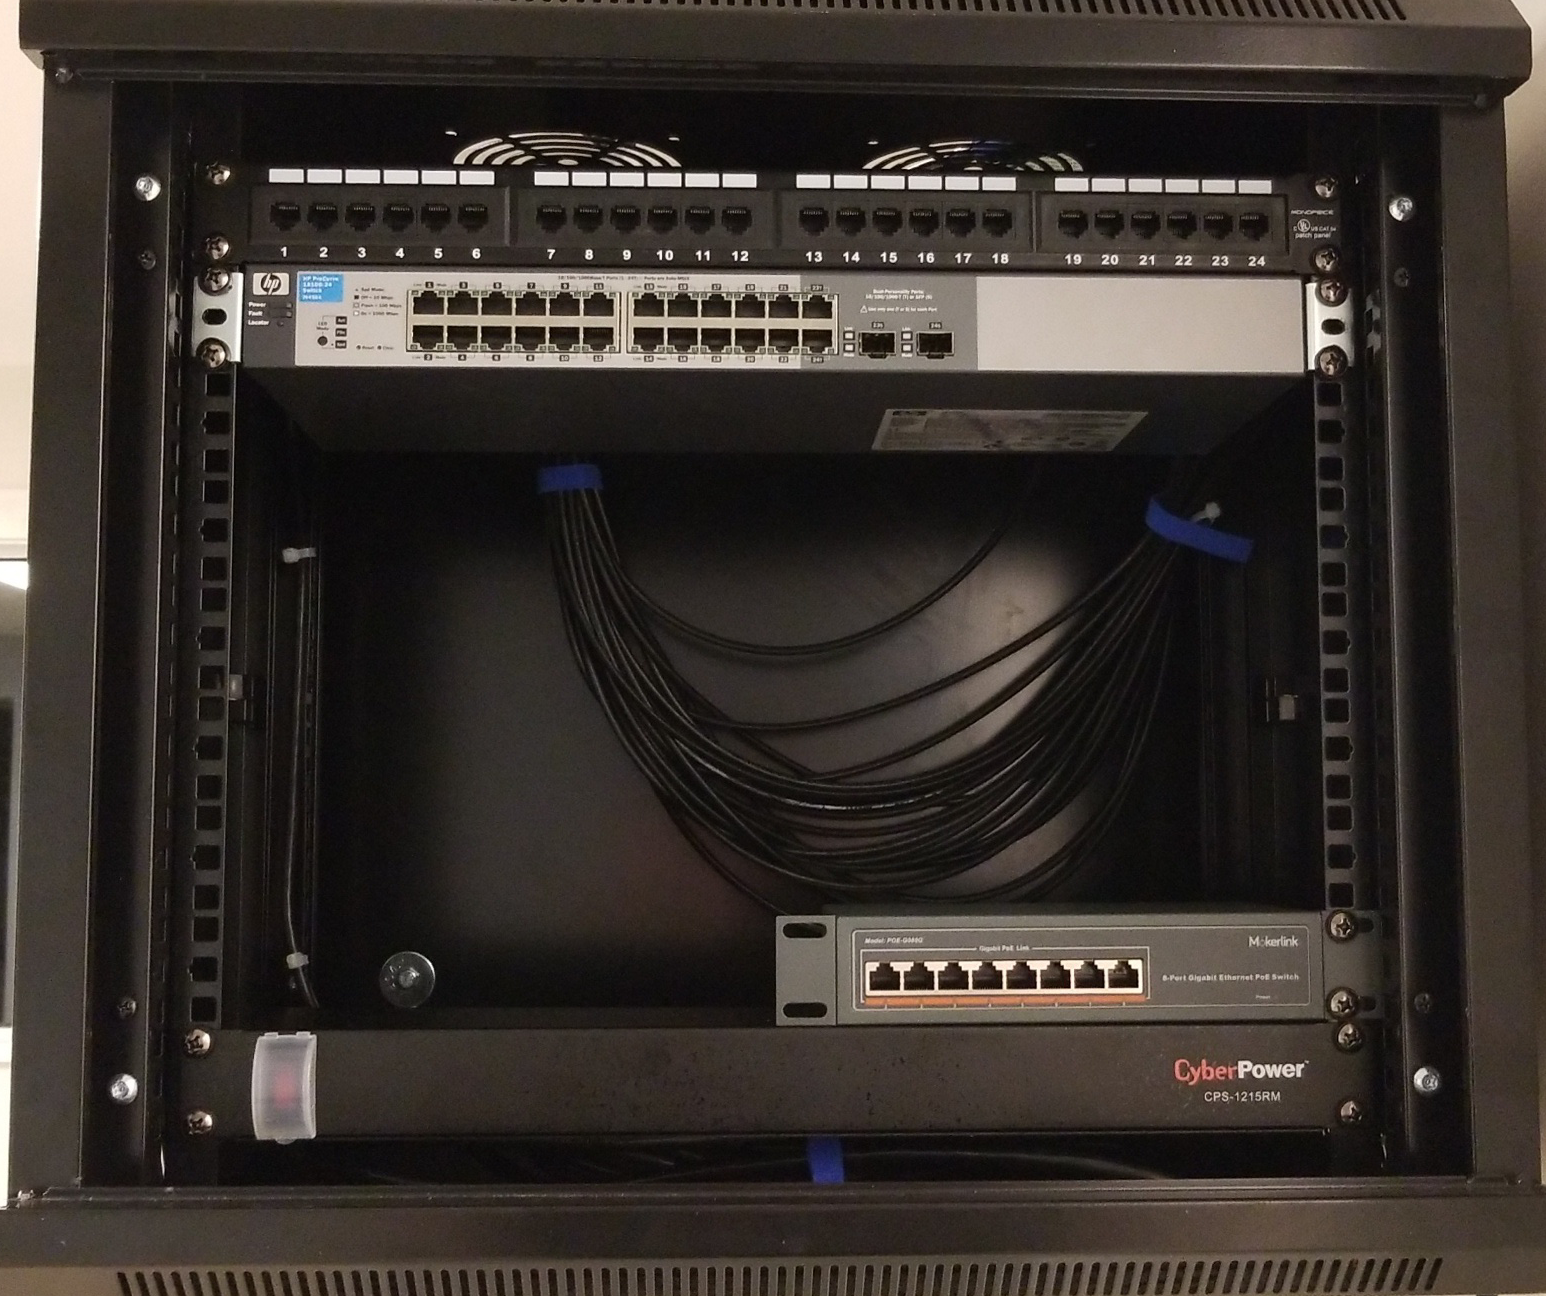
Other Hardware & Cabling
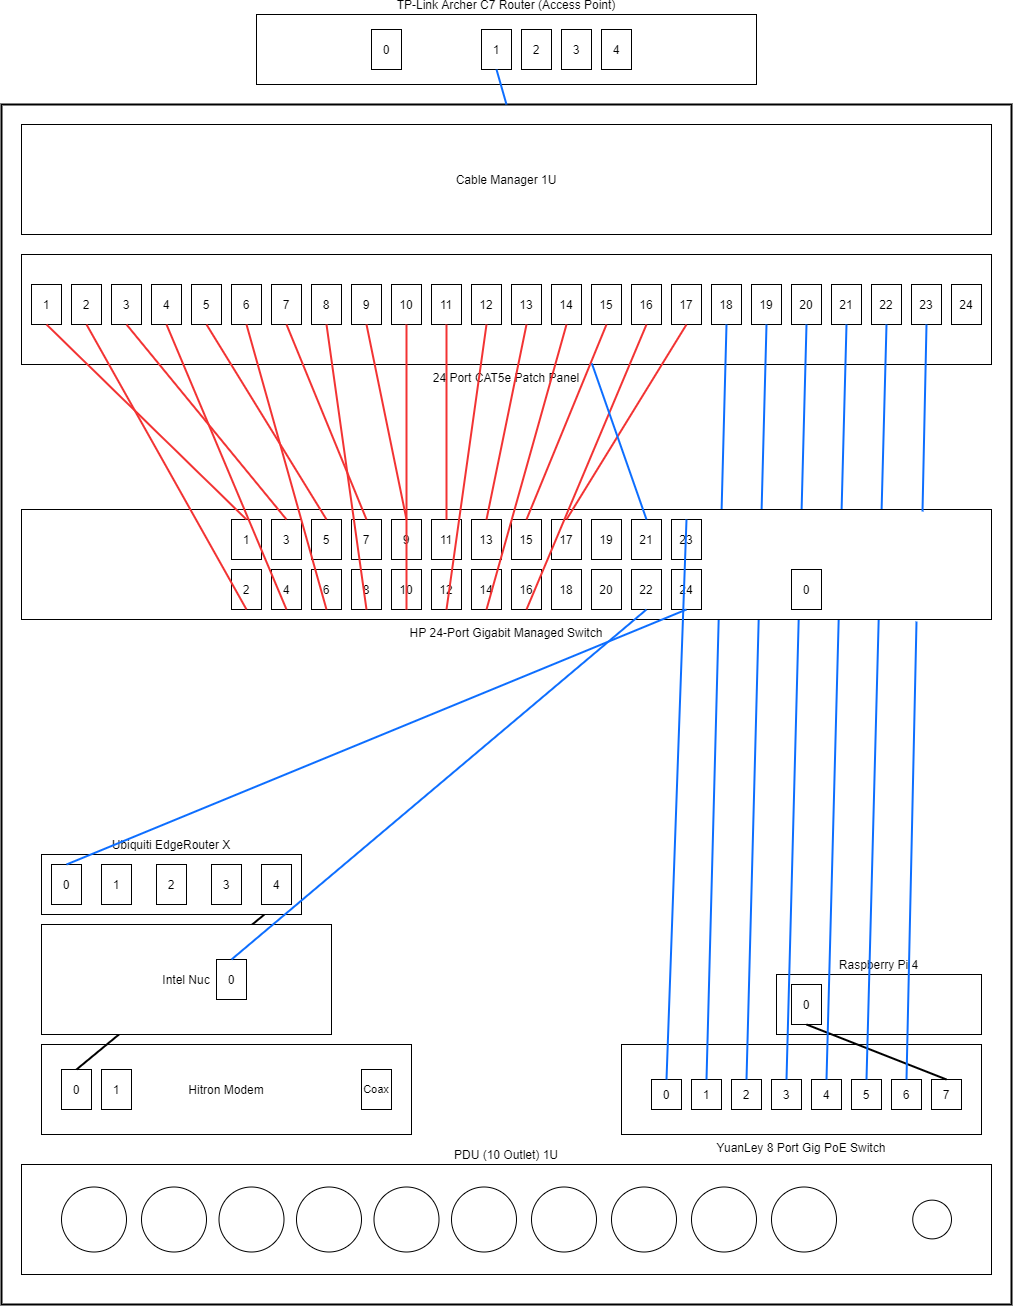
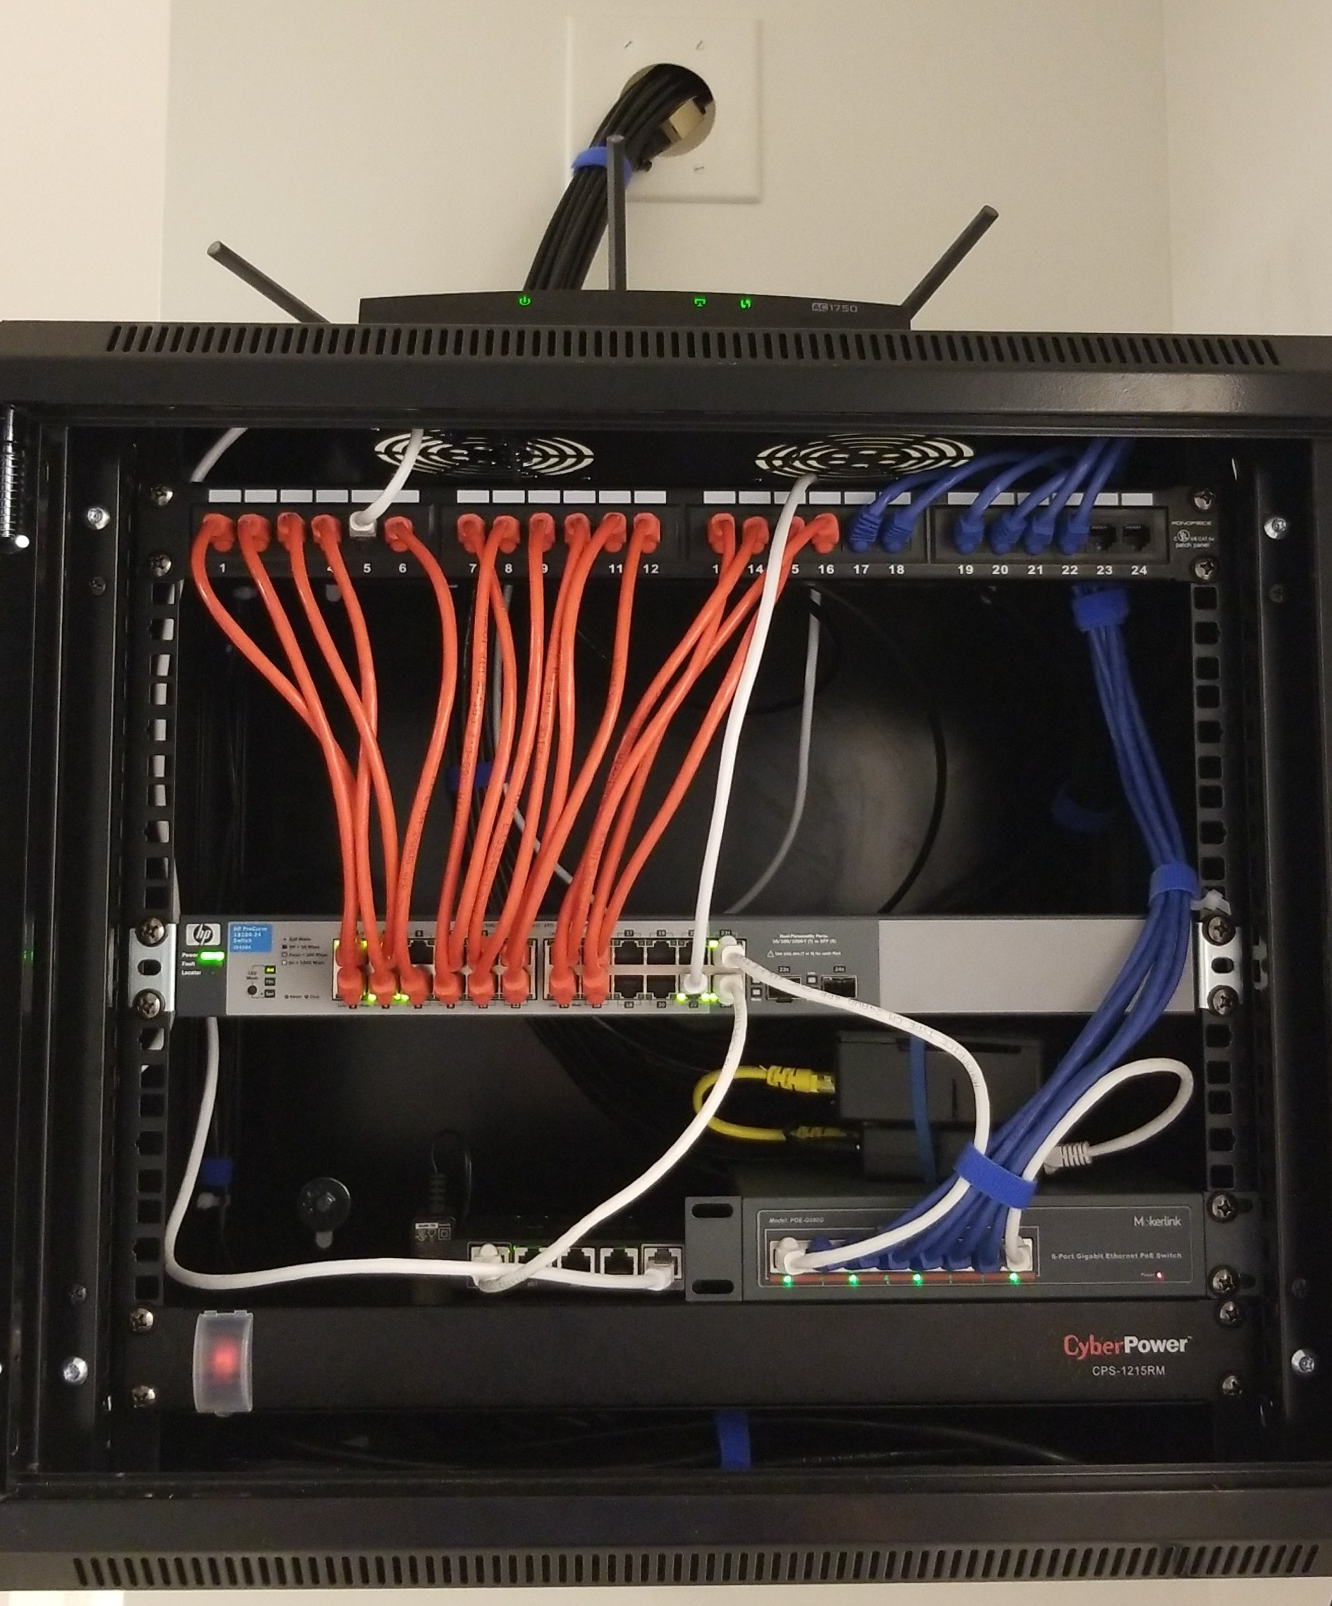
This is where things really change and almost finished. The managed switch gets placed in the middle due to the patch cables were longer than anticipated. Next time I'll get the half footers instead of the full footers.White colour cables are for connections between other equipment and hosts inside the rack. Red is for non PoE connections to wall plates. Blue is for PoE and IP camera runs.
The original ISP Coax run to the basement from the DMARC box is quiet old so unfortunately the signal is quite lower than how I had it setup before. (Only negotiates with 10/100) It was initially used for a TV which I split off from. Before the modem was from my bedroom upstairs with the office next door over. I ended up running the modem from my bedroom and then through jack #6 to the rack. This then goes to my Edgerouter X.
Previous router was a TP-Link Archer C7 with DD-WRT is now an access point. This router may go upstairs as the signal on 5GHz is a bit low to my liking.
For rack cooling, I came up with a somewhat ghetto solution. I hated the sound it made from the included fans that run from an outlet plug. So I came up with two 900 RPM Noctua Redux 120mm Fans and a fan adapter to outlet plug that runs on full 12V. I'm not that concerned on cooling capacity because everything is virtually passively cooled (thus silent), but I do want some air moving in the rack.
What's Next?
I plan on doing some VLANs for the cameras and guest network. Moving the home phone off the POTS line to a VOIP solution would be nice to cut down on the bill. Even though I won't see this rack on the daily, I do have a heart for some RGB lighting; maybe a smart plug and some IKEA light bar. The black cabling around the house is a tiny bit hideous so I may paint it white or a beige to match the aluminum siding. And as always, the homelab is never truly complete!
HomeLab: A Personal Home Network
April 29, 2021 - Reading time: 15 minutes
Introduction
Over the years I have acquired various small-business and enterprise-level networking equipment. This allows me continuously learn about new technologies and practice new skills, and further commit to self improvement during my spare time.
Part of the network, servers, and services operate on a dedicated secured production-like environment with a segregated workspace for development and testing. Equipment and systems are vendor agnostic which allows me to have hands-on experience on different vendor products.
Equipment & Software List
Basement Network Rack
- Wall-mounted 9U Network Cabinet Rack from PrimeCables.
- HP Procurve 1810G-24 (J9450A) Layer 2 Managed Gigabit 24 Port Switch
- YuanLey YS2080G-P Unmanaged Gigabit 8 Port PoE+ Switch
- Ubiquiti EdgeRouter ER-X
- TP-Link Archer C7 v2 AC1750 Router (as Access Point) with DD-WRT
- Raspberry Pi 4B 2GB Model Overclocked to 2GHz with PoE Splitter 5V/4A and PC fan mod on 3.3V GPIO pin
- Cyberpower CPS1215RM 1U 10 Outlet PDU Power Strip
- Intel NUC NUC5PPYH with 240GB Kingston A400 2.5" SSD and 8GB DRR3L RAM
- 5x Trendnet TV-IP321PI 1.3 MP PoE Dome IP Cameras
- ISP-provided cable Modem & Router Hitron CGN-3550
Computers
Rickert 1
VMware ESXi 6.7 host; Docker Host #1
- Ryzen 2600 (Non-X) 6C/12T @ 3.9GHz CPU
- DDR4 2400MHz 2x16GB Memory
- TP-Link TG-3468 Gigabit PCIe NIC
- Gigabyte GA-AX370-Gaming Motherboard
- Asus Radeon R7 240 2GB Low-profile GPU
- Dell PERC H310 SAS HBA RAID card with flashed LSI 9211-8i IT Mode firmware
- EVGA BQ 80+ Bronze 750W PSU
- Cooler Master N400 Mid Tower Case
- 3x 4GB WD Blue hard drives in raidz1 (FreeNAS Storage pool)
- 1x Samsung 860 EVO 512GB SSD (VM Storage)
- 1x ADATA SU720 512GB SSD (VM Storage)
- 1x Seagate Barracuda 2TB HDD (IP Camera Storage)
- 1x SanDisk Cruzer 16GB USB 3.0 Flash Drive (boot drive)
Rickert 2
Windows Server 2008 R2; Backup Host; Dell PowerEdge T100
- 2x4GB DDR2 Memory
- Intel Core2 Duo E8500 2c/2t @ 3GHz CPU
- Toshiba 160GB HDD (boot drive)
- 2x 2TB WD Blue (Hot swapping to offsite location and mirroring)
- Kingwin Single Bay 2.5/3.5 Hot-swap Drive Rack
RasPi4B
Raspberry Pi 4B 2GB Overclocked to 2GHz; Docker Host #2; Raspbian 10 (Buster)
- Lexar 64GB MicroSD (boot drive)
- PoE Splitter with USB-C 5V/4A (power by PoE only)
- 20MM brushed fan connected to 3.3V GPIO pin
- Aluminum heatsinks on Bluetooth/Wi-Fi, Ethernet, CPU, and RAM chipsets
- HighPi ABS plastic case
Services
- Virtual Machines
- Docker Containers
- Minecraft Bedrock Server (Minecraft Pocket Edition Game Server)
- Bitwarden_rs (Password Manager)
- Bludit (Blog Platform)
- Portainer with Agent (Docker web management)
- Factorio (Factorio Game Server)
- YoutubeDL-material (Youtube Video/Music Downloader)
- QBittorent (Web Torrent Client)
- Plex (Media Streaming Platform)
- MotionEye (IP Camera NVR and Viewer)
- Home Assistant (Smart Home Server)
- Heimdall (Personal Dashboard)
- Apache Guacamole (Clientless RDP Server)
- Caddy V2 (Reverse Proxy)
- Speedtest-Tracker
- Code-Server (VS Code on the web)
- First Mile Label (Project by me) (Shipment Label Generator)
- No Head Park (Project by me) (wdidle3 alternative)
- Mongo Express (MongoDB Web Management)
- MongoDB (Document-orientated DB)
- PHPMyAdmin (SQL Web Management)
- MySQL 5.7 (SQL DB)
- resume-beckrickert-com (Project by me) (Resume Website with NodeJS)
- kpugaming/kggbot (Project by me) (NodeJS Discord Bot)
- rickert/jimprest (Project by me) (Convert Images via URL on the fly with NodeJS)
- bloofare/rickert (Project by me) (NodeJS Discord Bot)
- And many more in the future...
Rack Layout
Patch Panel Legend